General information
- You can choose to view the calendar entries based on a “Week view” or “Month view”
- You can filter for / display / hide specific appointments by using the filter options at the top:
![]()

Custom “Admin” calendar settings
- Go to “Admin” > “Settings” > “Calendar”
=> Here you can define/change calendar categories, colours and resources
Steps
- In the main menu, click “Calendar”
=> The calendar is displayed in week view - Either use the arrows at the top (
![]() ) to flick through the weeks or click the calendar icon next to the arrows to select a specific date
) to flick through the weeks or click the calendar icon next to the arrows to select a specific date
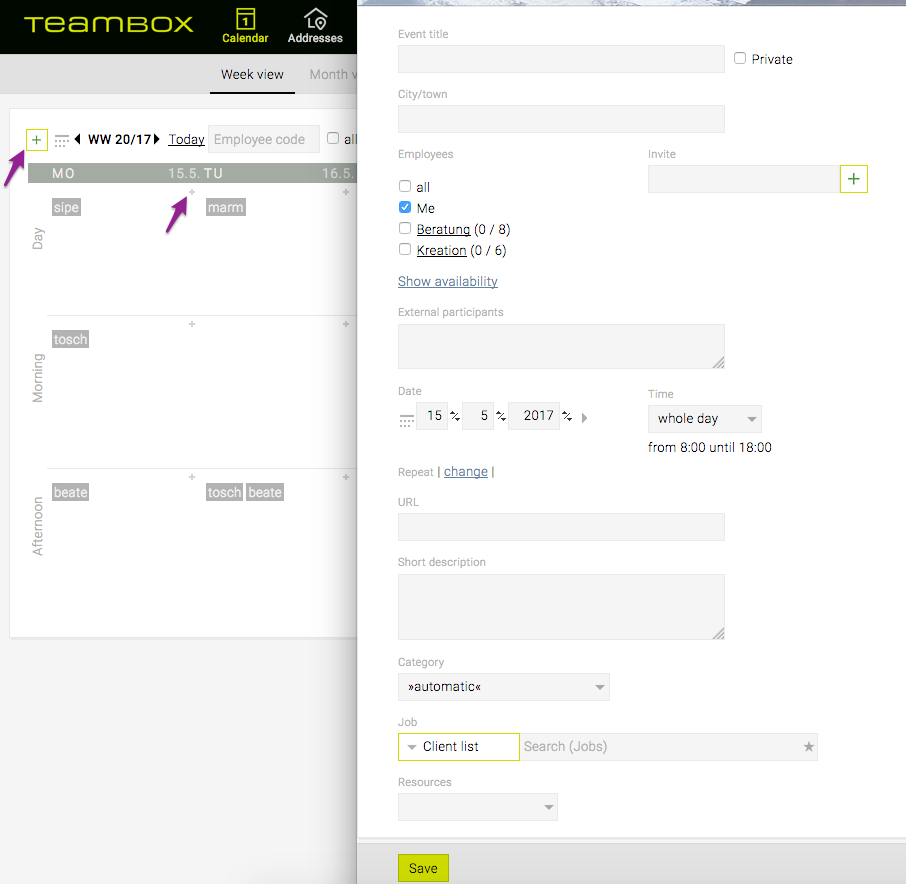
=> The relevant week is displayed - Click on the small ‘plus’ icon in any of the three week sections (i.e. “Morning” for events between 8 a.m. and 12 noon, “Afternoon” for anything between 12 noon to 6 p.m. or “Day” for whole-day events) to create a new calendar event OR click the green ‘plus’ icon in the top-right corner
=> The “Appointment” window pops up, the fields “Date” and “Time” are preset to the selected date and time period (but can be changed freely) - Enter an “Event title”
- You can select “Private” to block the appointment in the calendar while keeping others from reading the details of the event
- You can enter a location at “City/town” (this will automatically turn the appointment into an external event)
- You can adjust how frequently this event should occur by clicking “change” next to “Repeat”
- You can add a “URL” and a “Short description” for this appointment
- Optionally, you can enter participants’ names in “External participants” if you want to record their attendance without notifying them
- You may choose the nature of the appointment from the drop-down “Category”
HINT: based on your “Admin” setup, the appointment will be displayed in a different colour depending on your selection – find out more below - You can link the appointment with a job selected at “Job”
HINT: your appointment will be displayed in your job (in “Jobs”) - You can also choose a specific “Resource” from the last field (e.g. the meeting room of your choice)
HINT: after saving this appointment, the resource will be blocked (i.e. each resource can only be booked once within the same / an overlapping time period); you can define your resources in your “Admin” setup – find out more below - At the bottom of the window, click “Save”
=> The appointment has been created and is now displayed in the calendar
 ) to flick through the weeks or click the calendar icon next to the arrows to select a specific date