General information
- PLEASE NOTE: the following (financial) data cannot be migrated:
- Finalized, exported and EDI invoices cannot be migrated
- Exported and EDI out of pockets cannot be migrated
Preconditions
- existing job with migratable data
Steps
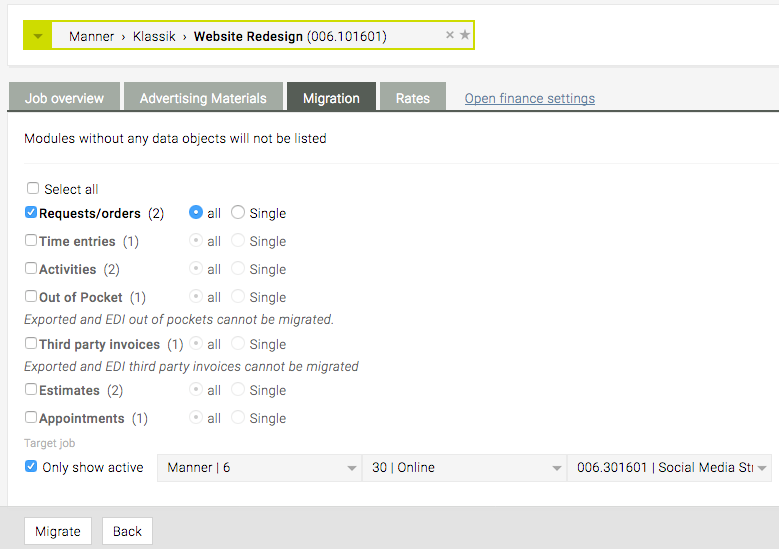
- Open an existing job and click the tab “Migration”
- To migrate …
- all available data, click “Select all” AND/OR
- specific data only, select the data type(s) of your choice (e.g. “Time entries”), click the radio button “Single” and select only those items that you want to migrate using the check boxes
- At “Target job”, use the job selector to choose the target job the data should be moved to
- Once you’re done, click “Migrate” at the end of the page
=> The data has been migrated to the specified target job
HINT: a common use case for this feature is to correct incorrectly entered entries (for example, time records that have been entered correctly but recorded for the wrong job)