General information
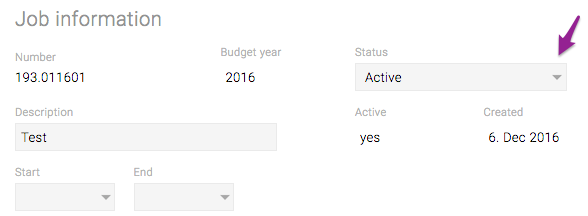
Here, you can define a custom job status (i.e. what is the current state of the job and what should be the name of that status?). Once a job status has been defined, it can be used in “Jobs” > “Job management” > “Job overview” > “Job information” > “Status”.
Steps
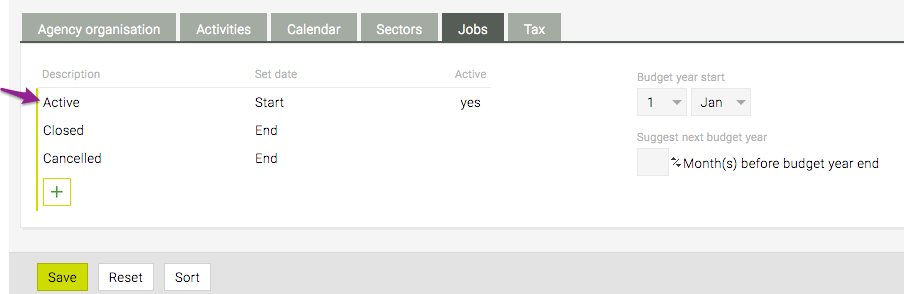
- Go to “Admin” > “Settings” > “Jobs”.
- To add a new job status, ..
- Click the green ‘plus’ icon at the end of the list
- Enter a status name and (un)check “Active” depending on your use case
- HINT: if a job status is set to inactive, the job will not automatically be listed in the tab “Jobs” > “Job management” > “Jobs”, but you would have to deselect the checkbox “only active” in the top-right corner of the tab to display jobs with an inactive job status
- If applicable, select “Start” or “End” in the column “Set date”
- HINT: if, for instance, “Start” is defined for this status, a new / edited job would be affected as such: as soon as this job status would be assigned to a job, today’s date (i.e. when the job is thus changed) would be set as “Start” date for this job
![]()
![]()
- Save your changes by clicking the green ‘check’ icon
- To change the start of the budget year, ..
- Select the relevant date from the drop-downs at “Budget year start”
- HINT: for most systems, we do not recommend the use of the automatted feature “Suggest next budget year” – using this would automatically set the next budget year for jobs that stretch into the next budget year, but most clients prefer to change the budget year manually
- At the bottom of the page, click ‘Save’
=> The job settings have been applied to the system.