Preconditions
- a previously created job
Steps
- Go to “Finances” > “Outgoing Invoice”
- Select a job and filter the results by “Budget year”, “Client”, “Area” and “Job” and click “select”
- Choose “Advance invoice” from the drop-down that is now displayed and click the link “create new” next to it
![]()
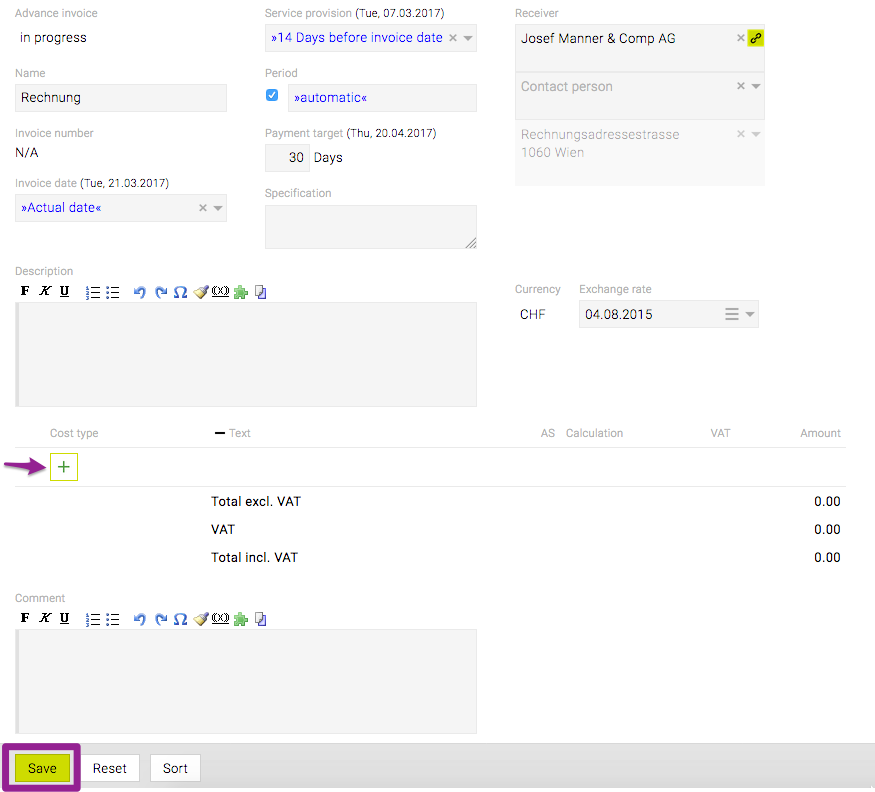
- Most of the fields already contain data which can still be edited
- Clicking the green ‘plus’ at the bottom of the page creates a new position; clicking the green ‘check’ icon after supplying the necessary data will save the position
- To finish creating the advance invoice, click the button “Save” at the bottom of the page

HINT: Advance invoices do not, as opposed to agency invoices, affect income figures. Therefore, in controlling, any figures related to an advance invoice will only show up in the column “Advance balance” and not as part of the income. When finalising an agency invoice, the “advance” (i.e. cash discount) can be transferred in the final calculations.