Steps
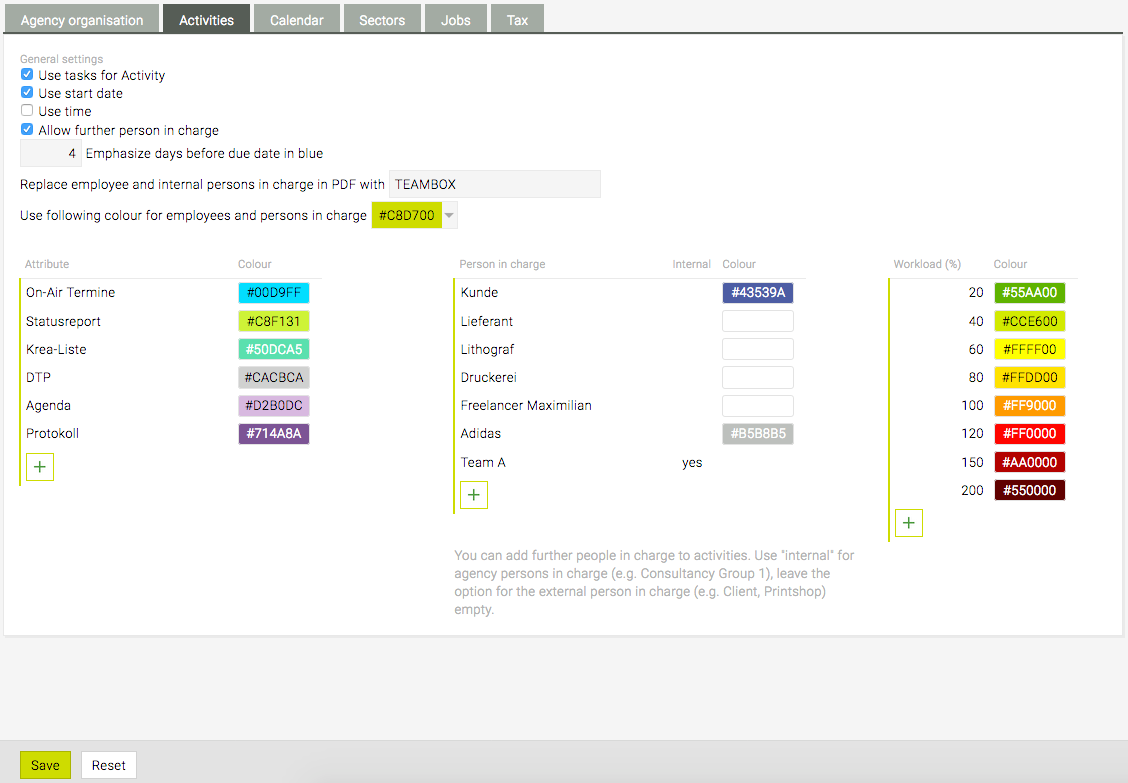
- Go to “Settings” > “Activities”
- Define / change the following settings according to your preferences:
- “Use tasks for Activity“ => enable using tasks for work packages
- “Use start date” => enable using activity start dates (in addition to end dates)
- “Use time” => add an extra column “Time” in “Activities” > “Activity list” to define the time (format hh:mm)
- “Allow further person in charge” => add extra line for work packages to define “Further person in charge“
- “Emphasize days before due date in blue” => define how many days before an activity’s due date the days’ colour will change to blue
- “Replace employee and internal persons in charge in PDF with” => insert the company name as replacement for employee names and internal persons in charge when exporting activity data as PDF
- “Use following colour for employees and persons in charge” => define the displayed ‘company colour’ in activities as hexadecimal code or using the colour picker
- “Attribute” column => define custom attributes and custom colours to enable / expand filtering for these attributes and customize their visual representation.
- “Person in charge” column => define persons in charge (internal or external)
- HINT: click “yes” in column “Internal” for internal work teams OR leave “Internal” blank for external contractors to be assigned as “Person in charge”.
- HINT: for externals, you can assign custom colours to customize their visual representation (e.g. in the Gantt chart); internals will be assigned the earlier defined ‘company colour’ (i.e. “Use following colour for employees and persons in charge”).
- “Workload ” column => define a heat map for resource planning depending on your work model (e.g. 38.5 hours per week). You can define the minimum and maximum possible workload for all employees as percentage, including custom steps from minimum to maximum (e.g. 20 – 40% – 60% – 80% – 100% – 120% workload).
HINT: for each stage, you can assign a custom colour to represent the extent of the workload. Usually, a colour scheme ranging from bright green (e.g. #55AA00) to dark red (e.g. #550000) has proven to be a useful colour scheme, hence the term ‘heat map’.
- At the bottom of the page, click ‘Save’
=> The settings have been applied to the system.